-
シーンから探す
- その他
- 同人誌
- テレビ台
- 着物
- ダイエット
- その他
- アクセサリー
- ビジネスバッグ
- PC周辺機器
- アート/エンタメ/ホビー
- リング
- ニット/セーター
- ブーツ
- アート、エンターテインメント
- パーツ
- 自転車
- 収納/キッチン雑貨
- スノーボード
- コスプレ衣装
- 愛知県の生活雑貨
- ルアー用品
- 遊園地/テーマパーク
- ロングワンピース
- 工芸品
- 男性和服、着物
- 印刷物
- 工芸品
- 農業
- コミック/アニメ
- ショルダーバッグ
- 和装・和小物
- その他
- 大阪府の服/ファッション
- 腕時計(アナログ)
- オーディオ機器
- 科学、自然
- ベッド
- 知育玩具
- 趣味、スポーツ、実用
- バイク
- 日本酒
- その他
- その他
- オフィス家具
- パーツ
- キッズ/ベビー/マタニティ その他
-
贈る相手から探す
- 演劇
- バッグ
- その他
- 印刷物
- ギター
- カルタ/百人一首
- コミック/アニメ
- その他
- アート/エンタメ
- 生活家電
- バッグ
- 自転車
- 古書、古文書
- リール
- トップス
- ノートパソコン
- オートバイ
- その他
- 一般
- 版画
- 自転車本体
- キッズ服女の子用(90cm~)
- ひざ丈ワンピース
- 観葉植物
- ウェディング
- ブランド別
- オートバイ車体
- ミニカー
- その他
- 照明(ライト)・ランプ
- 家電
- ブランド別
- 全巻セット
- 棚・シェルフ・ラック
- スポーツ別
- その他
- エンジン、過給器、冷却装置
- アート、エンターテインメント
- キッチン用品
- 雑誌
- ゲーム
- サングラス/メガネ
- 車内アクセサリー
- 記念品、思い出の品
- 国内自動車本体
- スポーツ別
- レディースファッション
- 工芸品
- その他
- その他
- パーツ
- インテリア小物
-
カテゴリから探す
- その他
- エンジン、冷却装置
- その他
- トートバッグ
- バッジ
- 同人誌
- 印刷物
- その他
- カーテン
- ライト、ウィンカー
- ブランド別
- テニス
- 植物/観葉植物
- トップス
- ブレスレット
- キッズ服女の子用(90cm~)
- 調理器具
- ウェア
- アート、エンターテインメント
- ライト/照明
- フィギュア
- 工具、DIY用品
- 外装、車外用品
- その他
- Tシャツ/カットソー(半袖/袖なし)
- タレントグッズ
- カード
- DVD
- プラモデル
- その他
- ノートパソコン
- コスプレ
- 収納/キッチン雑貨
- ファッション/小物
- 業務用厨房機器・用品
- テーブル
- 趣味/スポーツ
- タイヤ、ホイール
- 周辺機器
- 棚/ラック
- ポシェット
- ソファ/ソファベッド
- マフラー
- おまとめ注文・法人のお客様
送料込み 購入 アークナイツ 公式美術設定集 資料設定集 設定集 公式グラフィック VOL.1 イラスト集 特典セット付き


-
商品説明・詳細
-
送料・お届け
商品情報
残り 3 点 16,800円
(955 ポイント還元!)
翌日お届け可(営業日のみ) ※一部地域を除く
お届け日: 01月06日〜指定可 (明日20:00のご注文まで)
-
 ラッピング
ラッピング
対応決済方法
- クレジットカード
-

- コンビニ前払い決済
-

- 代金引換
- 商品到着と引き換えにお支払いいただけます。 (送料を含む合計金額が¥286,795 まで対応可能)
- ペイジー前払い決済(ATM/ネットバンキング)
-
以下の金融機関のATM/ネットバンクからお支払い頂けます
みずほ銀行 、 三菱UFJ銀行 、 三井住友銀行
りそな銀行 、ゆうちょ銀行、各地方銀行 - Amazon Pay(Amazonアカウントでお支払い)
-

人気商品(ギフトモール店)
全てのギフトを見る-
 快盗戦隊ルパンレンジャーVS警察戦隊パトレンジャー 早見初美花 コスプレ 衣装
189,999円
-
 ファクトリーゼロ シングルスタンド
16,000円
-
 男の子 スーツ セットアップ 入園式 発表会
1,580円
-
 蛸のイレットペーパーホルダー インテリア壁掛け置物演出特殊タコ小物装飾品オクトパスオブジェ洋風飾り便所トイレ雑貨壁飾りウォールデコ
8,500円
-
 なちゅこれシナモロール ブラセット
7,480円
-
 来生かほ 恋は発育中!
12,000円
あなたへのおすすめ商品
あなたへのおすすめ商品をもっと見る-

《コラボ美品》鉄コン筋クリート × グラニフ 刺繍 ブルゾン 松本大洋 希少L
19,999円
-

8,800円
-

364,510円
-

45,000円
-

マイケルコース レディース ショルダーバッグ バッグ JET CAMERA BAG - Across body bag - brown/black
55,800円
-

【新品未使用】BAPE×Timberland プレミアムウォータープルーフブーツ
32,500円
-

363,900円
-

20,000円
-
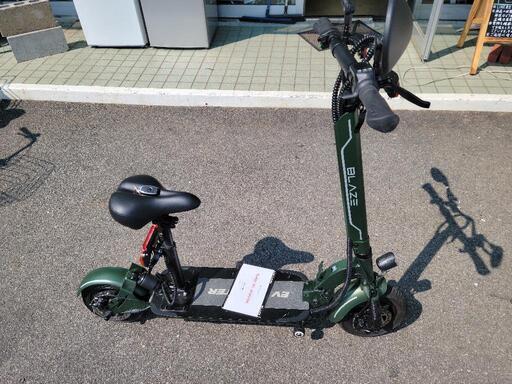
【新商品】BLAZE EV SCOOTER 電動バイク リサイクルショップ宮崎屋佐土原店22.10.2K
92,800円
-

1円~ 内未開封 ジェプラス 空想物件検証録 1/2000 ルパン三世 カリオストロの城 限定カラー・ミッドナイトバージョン
23,010円


美術設定集 VOL.1
寒白菊(カンシロぎく)種以外全セット付き
セット内容
1.美術設定集本体
2.クリエイティブチームインタビュー
3.アーミヤプランターコーデver.アクリルスタンド
4.ドクター通行認証
5.アーミヤ-プランター コーデ シリアルコードカード付き (日本大陸サーバー、ビリビリサーバーのみ使用可能)
●寒白菊種セットはついておりません
海外の種と土は輸入できませんので種セットを廃棄する為一度開封したことがありますが新品となります
48時間以内にお振込みいただけない場合は落札者都合による削除を行う場合がありますので予めご了承お願いいたします。
ノークレーム、ノーリターンでお願いいたします